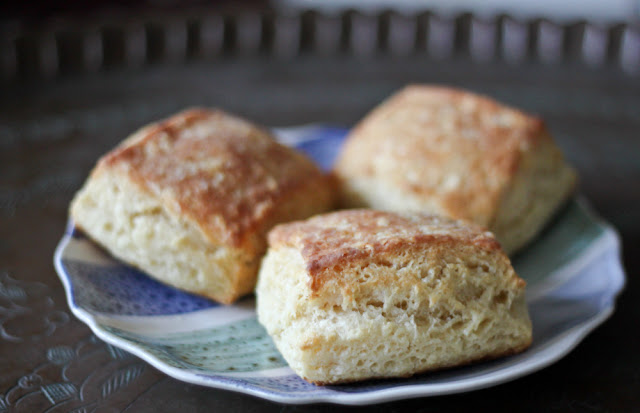
Flakiest Butteriest Biscuits
I've posted in the past about some of the easiest (yet awesome) drop biscuits you'll ever make, which come together in a flash and are really tender and delicious.
Today, however, I'm going to the other side of the spectrum and giving you a biscuit recipe that's a tad more involved.
But man oh man is it flaky and tender. And super, duper buttery. So buttery, in fact, that no butter is needed on these biscuits, only jam!
 |
| Yes, that's a chocolate and tart cherry preserve, but sadly the Galena Canning Company doesn't seem to sell it anymore (well not online at least). |
And look just how golden they are on top (while staying really tender inside).
Now I'm not a southerner with a lot of biscuit making experience. So if you compare mine to those from ATK they didn't get quite the same height that theirs did. I suspect perhaps that my butter may have warmed up too much while preparing the layers? I'm not sure, but I feel like that's what Paul Hollywood and Prue Leith would tell me.
Yours in encouraging all the fun and delicious baking projects,
Jacqueline
Flakiest, Butteriest Biscuits, from America's Test Kitchen.
Notes: You must watch the YouTube video they have of how they made these biscuits. It'll make all the steps below a LOT clearer if you do. And they give you fun tricks to keep track of all your folds.
Grated butter is used so that it's evenly distributed in the flour mixture. In hot or humid environments, chill the flour mixture, grater, and work bowls before use. The dough is folded like a letter 5 times to create all those layers. Touch the dough as little as possible, using a bench scraper to help you fold the dough onto itself. You'll also notice that after the dough is ready, the edges are trimmed before cutting the square biscuits. That's so that your biscuits will have the ultimate rise (and are not hampered by the compressed edge).
Using a higher-protein all-purpose flour (such as King Arthur) provides the ideal amount of structure for flakiness (rather than fluffiness, which you’d get with a lower-protein flour), while buttermilk gives the biscuits tang and sugar lends complexity. But other types of all-purpose flour will work with the recipe.
The dough will start out very crumbly and dry in pockets but will be smooth by the end of the folding process; do not be tempted to add extra buttermilk. Flour the counter and the top of the dough as needed to prevent sticking, but be careful not to incorporate large pockets of flour into the dough when folding.
Ingredients
3 cups (13 oz) King Arthur all-purpose flour (see note above)
2 tablespoons sugar
4 teaspoons baking powder
½ teaspoon baking soda
1 ½ teaspoons salt
16 tablespoons (2 sticks) unsalted butter, frozen for 30 minutes (see note above)
1 ¼ cups buttermilk, chilled
Directions
- Line rimmed baking sheet with parchment paper and set aside. In a large bowl, whisk together flour, sugar, baking powder, baking soda, and salt.
- Coat the semi-frozen sticks of butter in flour mixture. Holding the box grater with large holes over the flour mixture, grate 7 tablespoons from each stick directly over the flour. Toss gently to combine. Set aside remaining 2 tablespoons butter.
- Add buttermilk to flour mixture and fold with spatula until just combined (dough will look dry; see note above). Transfer dough to liberally floured counter. Dust surface of dough with flour, and using your floured hands, press dough into rough 7-inch square.
Dough will look dry when you turn it onto your counter
(all these pictures are screenshot from the ATK video) - Flour a rolling pin and roll dough into 12"h x 9"w rectangle, with short side parallel to edge of counter. Starting at bottom of dough, use a bench scraper to fold dough into thirds, like a business letter. Press top of dough firmly to seal folds. Mark this as your first fold. (Yes, it will still look dry and crumby, but that's OK!)
First fold - Turn dough 90 degrees clockwise (so that the short side of the dough is parallel to the counter edge like before). Repeat step 4 four more times (roll into rectangle, fold like a letter, turn 90 degrees) for a total of 5 folds.
By the 5th roll you can see how it comes together.
It'll be a little harder to roll at this point with the gluten formation. - After the 5th fold, roll dough into 8 1/2-inch square, about 1 inch thick. Transfer dough to prepared baking sheet, cover with plastic wrap, and refrigerate for 30 minutes. Adjust oven rack to upper-middle position and heat oven to 400 degrees.
- Transfer dough to lightly floured cutting board. Flour the edge of a very sharp chef’s knife (to ensure clean cuts without smashing the dough). Trim away 1/4 in of dough from each side of the square. You can throw this away (gasp) or just form an extra, wonky biscuit from the scraps.
- Cut dough into 9 squares, flouring knife after each cut. Arrange biscuits at least 1 inch apart on your prepared baking sheet.*
*If you wanted to bake these on another day, I think you could freeze them at this step. Then bake them straight from the freezer (after brushing with butter), for about 25 minutes. - Melt reserved 2 tablespoons of butter; brush tops of biscuits with melted butter. Bake until tops are golden brown, 22 to 25 minutes, rotating sheet halfway through baking.
- Transfer biscuits to wire rack and let cool for 15 minutes before serving.


Comments
Post a Comment