Thankgiving: Pull-apart dinner rolls
About a week before the big day I thought I'd figured out all my Thanksgiving meals. And then Molly asked me about rolls and stuffing. Oh my! I'd completely spaced about two of the most traditional Thanksgiving side-dishes!
I could have caved and just bought some from the store but I told myself no pre-packaged/prepared dishes this year. Only homemade. So I immediately went to a few of my go-to cooking sites (Smitten Kitchen, Pioneer Woman, and Cooks Illustrated are my top three) on a mission to find recipes. Luckily, Pioneer Woman had recipes for both rolls AND stuffing (my next post...). And what's even better, the rolls could be prepared days in advance. Ahhhh, how I love her.
And that's how Molly and Pioneer woman saved Thanksgiving.
These rolls are your classic, white bread American rolls. They're not the buttery and flaky type. They fall more into the category of soft and tender bread rolls. They taste great as leftovers but you MUST try them as they come straight out of the oven. Melt in your mouth deliciousness.
Also, you must check out the Pioneer Woman's blog. Her pictures/narrative are amazing. And she has a bagillion process photos (yes, more than me!) so you can get a better sense of how the bread should turn out. http://thepioneerwoman.com/cooking/2007/11/pw_dinner_rolls_-_no_kneading_required/
The thing is- the rolls were ridiculously easy to make. Definitely something I suggest everyone tries out at least once. Just look how home-made and awesome they look.

Let's start, shall we? As always, recipe will be posted at the end.
In a large stockpot, combine milk, sugar and oil and mix together.

Heat milk to almost boiling. It'll get kinda frothy looking. Make sure to watch the milk and stir while heating- you don't want to burn it.

When almost boiling, remove from heat. Allow the milk to cool down to 90-110 degrees. If you have a heavy stockpot like mine it'll take a while (~ 1 hour). To speed up the process transfer the milk to a large bowl.
Basically the side of the bowl/pot should feel lightly warm/room temp to the touch- but NOT HOT. If it's too hot you'll kill all the yeasties and your dough will never rise. And just look at them- they just wanna help!

Now go ahead and add 4 cups of flour + the yeast to the cooled milk mixture and mix it together.

It'll look kinda soupy.

Once incorporated, add another 4 cups of flour to the mixture. It's a lot thicker but still pretty wet.

Now cover the pot/bowl with a kitchen towel and place somewhere warm to rise for one hour. See how poofy it got compared to the photo above? It's almost double in size at this point.

Now just add the last 1 cup of flour + baking soda/baking powder/salt. Stir it or lightly knead it to combine.

At this point my dough still felt a little too wet. The dough should be a teeny bit sticky, but not too wet. Grab a little piece and try rolling it into a ball. If it feels too stick or is too wet, add flour ~1 TBSP at a time and mix. Don't add too much flour though- you don't want to dry out the dough. The consistency of the dough should be slightly sticky and stretchy. Like this.
Please folks, DO try this at home.

OK- at this point you could follow the rest of the recipe if you want to prepare rolls the same day as the dough. But I actually made this dough TWO DAYS before Thanksgiving. So if you're gonna use it in a day or two, form the dough into a large ball.

Rub it with a bit of oil (to prevent the dough from forming a "skin") and cover with plastic wrap directly touching the dough. Then cover the bowl top with plastic wrap as well.

And just pop it into the fridge.
Warning: the dough will continue to rise a bit. So the next day you may see this monster. It's ALIVE!

Don't worry. Just give it a punch or two to deflate the dough and continue to store it the fridge until you need it.
The day of Thanksgiving I kept the dough in the fridge until a few hours before baking. So at 3:30 I started to prep the rolls. Why 3:30? Well, that's when my excel spreadsheet told me it was time. Yea for being anal!

To prepare the rolls, butter 2 muffin/cupcake tins. Roll a walnut-sized piece of dough into a little ball and place in a muffin tin. Repeat until you have THREE balls in each tin. Just smush them in there, they'll fit. (Sorry, no pics. Check out Pioneer Woman's blog to see what it should look like at this point).
I had a lot of extra dough- could have easily gotten another 6-12 rolls out of it. But I didn't have any more muffin tins so I just let Dan play with the dough. Ohhhh boy, THAT was interesting! We definitely had a lot of fun on Thanksgiving while Dan had too much fun with the bread dough. I'd share the movie with everyone but it isn't quite so family friendly. But if you ask nicely- I'll send you the link :)
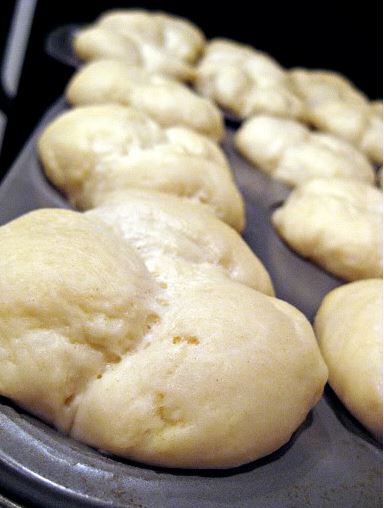
OK, back to the rolls. Cover the rolls with a kitchen towel and let them rise for 2-3 hours. After a few hours they'll look like this. Poofy!

Extreme food closeup!
And that's it. Just pop them into a 400 degree oven for 15-20 minutes, right before you're gonna serve dinner. (We baked them at 350 for a bit longer and they turned out fine.)
Dan also had the genius idea of buttering them while in the oven. A little butter never hurt! So just brush on some melted butter before popping them in the oven if you want.
The best part about the rolls was that they easily broke apart into perfectly sized pieces (to shove into your mouth).
Yea for delicious and super easy dinner rolls!
Jackie
No-knead Dinner Rolls, adapted from Pioneer Woman
Ingredients
* 4 cups Milk
* 1 cup Sugar
* 1 cup Vegetable Oil
* 9 cups Flour
* 2 packages (or 4 1/2 Tsp.) Active Dry Yeast
* 1 teaspoon (heaping) Baking Powder
* 1 teaspoon (scant) Baking Soda
* 2 Tablespoons Salt
Instructions
Pour 4 cups of milk into a stock pot or Dutch oven. Add one cup of sugar and 1 cup of vegetable oil and stir. Heat over medium to medium low heat until the milk is foamy and almost boiling. Remove from heat and cool until the milk is no longer hot to the touch, between 90-110 degrees. (If the milk is too hot it will kill the yeast.)
When cooled, add 4 cups of flour and all the active dry yeast. Stir until combined. Add another 4 cups of flour. Stir together and allow to sit, covered with a tea towel or lid, for an hour. (If after an hour it hasn't almost doubled in size, put in a warm (off!) oven for another 45 minutes or so.) When risen, add 1 more cup of flour, 1 heaping teaspoon of baking powder, 1 scant teaspoon of baking soda and about 2 tablespoons of salt. Stir or mix with your hands until combined. (If the dough is still too wet at this time, add flour 1 TBSP at a time until the dough isn't too sticky and can be easily rolled into balls.)
At this point, either continue with the recipe as written below, or store the dough for a few days.
If storing dough: form dough into a large ball, coat with a little bit of oil (1+ TBSP or so), and cover with plastic wrap. Punch down dough over the next day or two if it gets unwieldy. When ready to use dough, remove from fridge and continue as written below.
To prepare rolls: Butter 1 or 2 muffin pans. Form the rolls by pinching off a walnut sized piece of dough and rolling it into a little ball. Repeat and place three balls of dough into each buttered muffin cup. Continue until pan is full. You'll get between 24-36 rolls (2-3 tins). Cover with towel and and allow to rise for about 2-3 hours.
Bake in a 400-degree oven until golden brown, about 15 to 20 minutes.
Optional: Brush tops of rolls with some melted butter before/during their trip in the oven.
I could have caved and just bought some from the store but I told myself no pre-packaged/prepared dishes this year. Only homemade. So I immediately went to a few of my go-to cooking sites (Smitten Kitchen, Pioneer Woman, and Cooks Illustrated are my top three) on a mission to find recipes. Luckily, Pioneer Woman had recipes for both rolls AND stuffing (my next post...). And what's even better, the rolls could be prepared days in advance. Ahhhh, how I love her.
And that's how Molly and Pioneer woman saved Thanksgiving.
These rolls are your classic, white bread American rolls. They're not the buttery and flaky type. They fall more into the category of soft and tender bread rolls. They taste great as leftovers but you MUST try them as they come straight out of the oven. Melt in your mouth deliciousness.
Also, you must check out the Pioneer Woman's blog. Her pictures/narrative are amazing. And she has a bagillion process photos (yes, more than me!) so you can get a better sense of how the bread should turn out. http://thepioneerwoman.com/cooking/2007/11/pw_dinner_rolls_-_no_kneading_required/
The thing is- the rolls were ridiculously easy to make. Definitely something I suggest everyone tries out at least once. Just look how home-made and awesome they look.
Let's start, shall we? As always, recipe will be posted at the end.
In a large stockpot, combine milk, sugar and oil and mix together.
Basically the side of the bowl/pot should feel lightly warm/room temp to the touch- but NOT HOT. If it's too hot you'll kill all the yeasties and your dough will never rise. And just look at them- they just wanna help!
Please folks, DO try this at home.
Warning: the dough will continue to rise a bit. So the next day you may see this monster. It's ALIVE!
The day of Thanksgiving I kept the dough in the fridge until a few hours before baking. So at 3:30 I started to prep the rolls. Why 3:30? Well, that's when my excel spreadsheet told me it was time. Yea for being anal!
To prepare the rolls, butter 2 muffin/cupcake tins. Roll a walnut-sized piece of dough into a little ball and place in a muffin tin. Repeat until you have THREE balls in each tin. Just smush them in there, they'll fit. (Sorry, no pics. Check out Pioneer Woman's blog to see what it should look like at this point).
I had a lot of extra dough- could have easily gotten another 6-12 rolls out of it. But I didn't have any more muffin tins so I just let Dan play with the dough. Ohhhh boy, THAT was interesting! We definitely had a lot of fun on Thanksgiving while Dan had too much fun with the bread dough. I'd share the movie with everyone but it isn't quite so family friendly. But if you ask nicely- I'll send you the link :)
OK, back to the rolls. Cover the rolls with a kitchen towel and let them rise for 2-3 hours. After a few hours they'll look like this. Poofy!
Extreme food closeup!
Dan also had the genius idea of buttering them while in the oven. A little butter never hurt! So just brush on some melted butter before popping them in the oven if you want.
The best part about the rolls was that they easily broke apart into perfectly sized pieces (to shove into your mouth).
Jackie
No-knead Dinner Rolls, adapted from Pioneer Woman
Ingredients
* 4 cups Milk
* 1 cup Sugar
* 1 cup Vegetable Oil
* 9 cups Flour
* 2 packages (or 4 1/2 Tsp.) Active Dry Yeast
* 1 teaspoon (heaping) Baking Powder
* 1 teaspoon (scant) Baking Soda
* 2 Tablespoons Salt
Instructions
Pour 4 cups of milk into a stock pot or Dutch oven. Add one cup of sugar and 1 cup of vegetable oil and stir. Heat over medium to medium low heat until the milk is foamy and almost boiling. Remove from heat and cool until the milk is no longer hot to the touch, between 90-110 degrees. (If the milk is too hot it will kill the yeast.)
When cooled, add 4 cups of flour and all the active dry yeast. Stir until combined. Add another 4 cups of flour. Stir together and allow to sit, covered with a tea towel or lid, for an hour. (If after an hour it hasn't almost doubled in size, put in a warm (off!) oven for another 45 minutes or so.) When risen, add 1 more cup of flour, 1 heaping teaspoon of baking powder, 1 scant teaspoon of baking soda and about 2 tablespoons of salt. Stir or mix with your hands until combined. (If the dough is still too wet at this time, add flour 1 TBSP at a time until the dough isn't too sticky and can be easily rolled into balls.)
At this point, either continue with the recipe as written below, or store the dough for a few days.
If storing dough: form dough into a large ball, coat with a little bit of oil (1+ TBSP or so), and cover with plastic wrap. Punch down dough over the next day or two if it gets unwieldy. When ready to use dough, remove from fridge and continue as written below.
To prepare rolls: Butter 1 or 2 muffin pans. Form the rolls by pinching off a walnut sized piece of dough and rolling it into a little ball. Repeat and place three balls of dough into each buttered muffin cup. Continue until pan is full. You'll get between 24-36 rolls (2-3 tins). Cover with towel and and allow to rise for about 2-3 hours.
Bake in a 400-degree oven until golden brown, about 15 to 20 minutes.
Optional: Brush tops of rolls with some melted butter before/during their trip in the oven.


Comments
Post a Comment